Skip to content

Brown Butter Pumpkin S'mores Caramel Chocolate Chip Cookies (Woah)

The ultimate Fall and seasonal cookie. There is a reason why this is the first recipe I'm sharing with you all. I'm telling you, this is one of the most rewarding cookies you will ever make. Personally, I'm a huge fan of all brown butter cookies. It gives a rich and nutty type of flavor you only find in professional bakeries. And what is Fall without some pumpkin spice? Even if you are not a fan of the whole pumpkin spice phenomenon, this cookie has the perfect amount for that nice subtle flavor. I'm still finding it crazy that there is more to this cookie to discuss. It doesn't just have chocolate chips, but also homemade caramel bits that melt so nicely when baking. This cookie is already soft and chewy, but the caramel adds even more chewiness. If you couldn't tell I'm a huge fan of chewy cookies. Almost forgot the S'more part. Just when you thought it couldn't get better, there is a literal S'more stuffed inside. Woah...

Just watch this video to see what the hype is about.

My Recommended Equipment (Amazon)

Before we jump into the recipe here are the gadgets and equipment I used to bake this recipe with. For full disclaimer, clicking on the images will bring you to the amazon store. (I am an amazon affiliate and make commission off of sales). However, by no means are any of these tools required or encouraged to be purchased to make a quality product. Simply adding these here to show what I use and how they are useful to the recipe. Feel free to skip!

Kitchen Aid

The Kitchen Aid is my most loved appliance in all of cooking. So many add-ons for every type of recipe. I use this specifically for creaming and mixing my ingredients off screen. Huge time saver and gives great results.

Brewin Knives

Brewin Knives are a good quality, budget Japanese knife. I use this for cutting the chocolate in this recipe. However, any knife, honestly even a butter knife will do.

Acacia Cutting Boards

I use these Acacia cutting boards for everything. Mostly so I don't need to wipe my counter down. Great quality and relatively cheap item. Again any cutting board will do and is recommended when cutting ingredients in the recipe.

Silicone Utensils

Second favorite piece of equipment in my arsenal. Very cheap but made of silicone so they are perfect to use on heat without the risk of burning yourself or ruining the utensil. I recommend using these when making the brown butter and caramel.

Glass Bowls

Glass bowl. That's it. Great for mixing and heat resistant for the brown butter.

Stainless Steel Baking Trays

Stainless steel baking trays are great for either cooling ingredients in the fridge or baking. However, any type of tray will do for this recipe.

Ramekins

I like to use Ramekins for pre measuring ingredients. Also great in the baking world for other recipes such as souffles, lava cakes, etc.

Cookie Scoop

Great for consistent scooping of cookie dough. These also have a handle that scrapes the scoop to easily release the dough. Also great for icecream.

Ingredients

All ingredients must be measured to a tee. Baking is not a skill at all, it is a science. You cannot guess, estimate, or eyeball. I included some gram (g) alongside certain ingredients. I encourage you to weigh your ingredients if a scale is available to you. If not, good luck! Just kidding, but there are proper ways to measure ingredients. It kills me every time someone says they are bad at baking. No you are not bad at baking, you are simply bad at following directions. On a real note, it happens to everyone including me, about 2 times just for this recipe. If you have any problems or concerns please feel free to leave a comment or contact me directly 🙂 Refer below for proper usage/measurements of ingredients.

Butter: Recommended to use unsalted as you can adjust the salt amount more easily. Room temperature butter gives the best result in cookies, but it must be creamed properly with the sugar to do so! Refer to butter packaging for measuring info.

Granulated Sugar: Sweetener. More granulated sugar than brown can make for a crispier cookie. Measure by spooning into a measuring cup and leveling. DO NOT PACK.

Brown Sugar: Sweetener. The amount and type of brown sugar determines the chewiness of the cookie. Adding more brown sugar than granulated or adding "dark" brown sugar creates more chewiness. Measure brown sugar by packing it into a measuring cup and leveling it.

All Purpose Flour: All purpose flour must be used. Other types can ruin your cookie. Flour builds the structure of the cookie. Measure flour by sprinkling the flour in a measuring cup and leveling it off. DO NOT PACK.

Baking Soda/Powder: Leveling agents. Allow the cookie to rise. Measure with teaspoons and level.

Salt: Enhances the flavor of the cookie and balances sweetness. If using salted butter use less salt. Recommended to sprinkle flaky salt on finished product.

Vanilla Extract: Adds flavor to the cookie. Can sub for same amount of vanilla paste or 1 vanilla bean. Measure with teaspoons.

Pumpkin Spice: Use the spices in the recipe below. Adds subtle pumpkin flavor. Can sub with pumpkin pie or pumpkin spice that is pre made. Measure with teaspoons.

Pumpkin Puree: Adds slight pumpkin flavor and acts as a leveling agent. Reason why this recipe requires NO EGG. Be sure to get puree and not pumpkin pie filling, it is not the same. Measure with tablespoons.

Heavy Cream: Gives caramel bits its creamy texture and helps prevent burning in the oven. Recommended to use room temp cream. Measure with measuring cups.

Gram Crackers: Part of the center of the cookie. Any brand will work. Side note: Target sells cinnamon gram crackers that taste amazing.

Marshmallows: Part of the center of the cookie. Any brand will work however, they should be medium sized. Target sells ghost marshmallows 🙂

Chocolate: Staple of the chocolate chip cookie. Can sub caramel with another cup of chocolate chips. Any brand works. I used dollar store's brand in the video, came out great. I recommend dark chocolate for a more rich cookie. Additionally, chopping up chocolate bars makes for a more aesthetic cookie. Pro tip: Save a few chunks and add them on top of the cookie when you take it out. Looks great.

Brown Butter

In my opinion the most difficult part of this recipe, but if done, changes the whole level of your cookies. Brown butter is what gives a chocolate chip cookie a more defined, rich and nutty flavor profile. Before we get into perfecting the steps, refer to the common mistakes just below.

Common Mistakes

1. Too much heat. You should always cook your brown butter on a med-low heat. Too high can cause your butter to burn.

2. Not stirring constantly. Brown butter requires constant stirring to avoid burning.

3. Not pulling off the heat soon enough. Once your butter browns you only have about a 1-2 minute timer to pull it off the heat and transfer to a heat safe bowl. Failing to do so can cause your butter to burn.

4. Get those brown bits! When you transfer your brown butter, make sure to scoop out all of those dark brown bits at the bottom. Trust me, it is not dirt, it is flavor.

5. Chilling until set. When creaming your butter and sugar, the type of butter used (cold, melted, room temp) makes all of the difference. For a firm, risen, and chewy cookie, it is recommended to use brown butter that is set at room temperature (not melted).

brown butter

Making the Brown Butter

Begin melting 2 sticks and one tablespoon of butter in a saucepan on med-low heat. This will yield about 1 cup of brown butter (The extra tablespoon will evaporate). Continuously stir the mixture with a whisk or wooden spoon. There are 3 stages in the cooking process to look out for:

Melted butter. About 2 minutes in. It will take a few more minutes of stirring for the butter to reach the next stage.

Bubbling melted butter. about 4 minutes in. The butter will begin bubbling. Continue stirring to prevent the butter from sticking and burning to the pan.

Foaming melted butter. About 5-10 minutes in. Once the butter starts foaming you are almost there. Keep stirring and try to look into the foam to see the shade of the butter. It will start to brown any second. You are looking for it to turn into an amber color. Not too dark or else it will have a slight burn taste to it.

Brown butter. Once the butter resembles the shade of amber shown below. Immediately remove from the heat and transfer to a heat safe bowl. The butter should also give off a nutty fragrant, letting you know it is ready to be taken off of the heat. You only have a little bit before the butter starts to burn so be sure to keep an eye on the butter in the saucepan. When transferring the butter, be sure to scoop out all of the brown bits at the bottom of the pan. These bits will give the butter its rich and nutty flavor.

Congratulations! You have just made brown butter! Too cool, allowing the butter to set quicker, place the bowl in the fridge for about 30 minutes. Whisking the butter every 10 minutes can speed up the cooling process. Once the butter is set as shown below, you are ready to make the dough! Just be sure to whisk the butter to get a smooth consistency before creaming with the sugar.

Caramel Bits

The second hardest part of this recipe but it totally worth it. The caramel makes for an even chewier cookie and acts as almost a glue, keeping all of the ingredients together. I always thought caramel would go well with S'mores. And I guess I was right!

Making the Caramel Bits

Begin by melting the granulated sugar and water in a saucepan over med-low heat. It should take about 2-3 minutes for the sugar to dissolve and another 2 for the sugar to start bubbling. Again, be sure to continuously whisk. Once the sugar caramelizes and turns an amber color, cut the heat.

Immediately add the butter cut into small chunks into the mixture. It should start to bubble. Stir until combined.

Add the heavy cream and whisk. The mixture should steam and become thicker and velvety. If you find that the mixture is too watery, put on a low heat and mix a few minutes more. Once you achieve the desired texture, transfer the mixture to a heat safe tray, lined with parchment paper. Allow the mixture to cool for 30 minutes. You can speed up the process by putting in the fridge.

Once completely cooled, you can begin to break the caramel into bits with your hands, mallet, knife, pure rage, etc. I recommend breaking into small chunks with your hand and using a knife to cut into smaller bits, the same size as your chocolate.

The Dough

Let me tell you. This is the best dough I have ever eaten (I do not recommend eating raw cookie dough, but I did anyway). This is how you know you have a good cookie recipe, when the dough is a treat all by itself. Anyways, this part of the recipe is very basic and easy to follow. I wouldn't say fool proof, so I recommend following the steps and measurements EXACTLY. I also recommend referring to the tips below!

My Tips

1. Measure to a tee! Refer to the "Ingredients" section above for the proper way to measure your ingredients. Using a scale can give you better results.

2. Creaming the butter and sugars. Whisk, whisk, whisk! Cream for about 5 even 10 minutes. You can also use a stand or hand mixer to speed up the process. You are looking for a light and airy mixture that changes to a lighter color when properly mixed.

3. Pre mix your dry ingredients in a separate bowl. This allows your dry ingredients to be more easily measured and mixed when adding to your wet ingredients.

4. Folding your wet and dry ingredients. Huge difference between folding and mixing. When you fold, use your spoon to gently fold the ingredients over each other until just combined. This allows for less gluten to be developed and will give you a better textured cookie.

5. Add dry ingredients in batches. It is much easier to combine dry and wet ingredients if you add only half of your dry at a time.

6. Fold in your chocolate chips and caramel bits too! It is even ok for there to be a bit of flour visible in the bowl before you mix in the chips. After folding the chocolate and caramel, all the wet and dry ingredients should be completely combined.

7. Divide your cookie dough into 16 even balls. You can do this more easily with a cookie scooper (linked above in the equipment section) or with a scale. Honestly, you can eyeball it too. But pre-dividing your dough will make it easier to form your cookies.

8. Create slightly flat disks with your cookie dough balls and lay on top of your gram cracker and marshmallows. The dough does not need to engulf the entire thing, but should lay snug on top.

9. Transfer your cookies to a tray and chill for 1-2 hours. The longer the better. If you can wait 1-2 days the dough will deepen in flavor as the ingredients have more time to combine in the fridge.

Baking

I will admit, these cookies tend to not bake in the most easy manner. Often times the caramel and marshmallow will melt all over the place, and it will seem you have been baking these things for over 20 minutes just for them to set. I will go over my best baking tips for these and what to look for in order to get the most perfect bake possible.

Tips for Baking

1. Space the dough 4 inches apart on the baking tray. I bake 4 cookies at a time and make sure there is enough room from other cookies and the edge of the tray. The cookies will expand and it is a pain if they stick together.

2. Stiff to the touch. To see if your cookies are done baking, poke the center of one with your finger. If you are able to push a hole with little to no effort and dough still seems extremely soft, leave them to bake another 3-5 minutes.

3. Watch the color. The cookies should have dark, golden brown edges and a brown coloration on the top. If not, your cookies may be under-baked.

4. Leave on the tray after baking 5 minutes or longer. These cookies will seem to be goey and may be extremely breakable right after baking. This is due to the caramel, marshmallow, and chocolate melting. Do not worry! Keep the cookies on the tray until they start to cool. You will find the caramel, chocolate, and marshmallow will set after about 5 minutes.

5. Reshape. Use either a cookie spatula or a cup to reshape your cookies while they are still hot. Once they cool, the cookie will be set in the shape you make them. Trust me, some of my cookies looked like a crime scene, but with a little reshaping they looked just fine.

6. Transfer to a cooling rack after about 5-10 minutes and cool completely.

7. Enjoy!!!

This is my first recipe I have ever posted. I know it is not of the highest quality by any means, but I really enjoyed these cookies and wanted to share them with the public. Please comment below letting me know how they came out or with any questions. I am brand new to the social media and website thing so please bear with me as a continue to improve this brand! Thank you for your support!

Brown Butter Pumpkin S'mores Caramel Chocolate Chip Cookies (Woah)

Course: DessertDifficulty: Medium
Servings

16

cookies
Prep time

2

hours 

30

minutes
Baking Time

15

Minutes

The best Fall cookies you will ever make. Brown Butter chocolate chip cookies with a major twist: Pumpkin, S'mores and Caramel bits! A brown butter base always adds a nice rich, nutty flavor which every chocolate chip cookie needs. And who doesn't love S'mores? These cookies are stuffed with gram cracker and marshmallow making for an amazing, messy bite! To fit the Fall and Seasonal theme these cookies also have a subtle pumpkin spiced flavor and homemade caramel bits. So much happening with these cookies and in all the right ways!

Ingredients

  • 1 cup brown sugar, packed (200g)

  • 1/2 cup granulated sugar (100g)

  • 2 tsp vanilla extract

  • 6 tbsp pumpkin purée

  • 2 1/2 cups all-purpose flour (315g)

  • 1 tsp baking soda

  • 1/2 tsp baking powder

  • 1/2 tsp salt

  • 1 cup chocolate chips

  • 16 gram cracker squares

  • 16 marshmallows

  • Pumpkin Spice
  • 1 1/2 tsp ground cinnamon

  • 1/2 tsp ground nutmeg

  • 1/2 tsp ginger

  • OR

  • 2 1/2 tsp pumpkin/pumpkin pie spice blend

  • Brown Butter
  • 1 cup + 1tbsp unsalted butter (yields 1 cup brown butter)

  • Caramel Bits
  • 1 cup granulated sugar (200g)

  • 1/4 cup water

  • 6 tbsp unsalted butter, cut in small pieces

  • 1/2 cup heavy cream

  • 1 pinch of salt

Directions

  • Brown Butter
  • Add 1 cup + 1tbsp unsalted butter to a saucepan over med-low heat stirring continuously until the butter turns a light amber color (about 5-10 minutes). Refer to "Brown Butter" Section Above
  • Transfer brown butter to a large glass bowl and cool until set and room temperature.
  • Caramel Bits
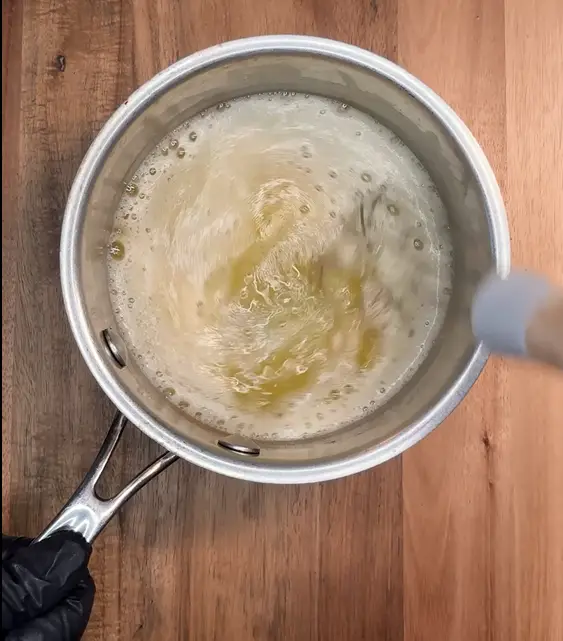
  • Add 1 cup of granulated sugar and 1/4 cup water to a saucepan over med-low heat stirring regularly until the sugar is dissolved and turns a light amber color (about 5-10 minutes). Refer to "Caramel Bits" Section Above
  • Stir in 6 tbsp of unsalted butter cut into small pieces. The mixture should start to bubble.
  • Cut the heat and add 1/2 cup of heavy cream and stir until the mixture is velvety and creamy. Add a pinch of salt and stir it in.
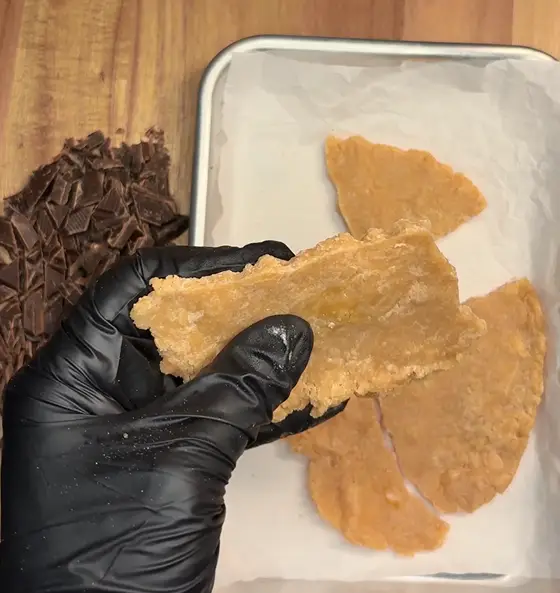
  • Transfer the mixture to a heat safe tray and cool until hardened.
  • The Cookies
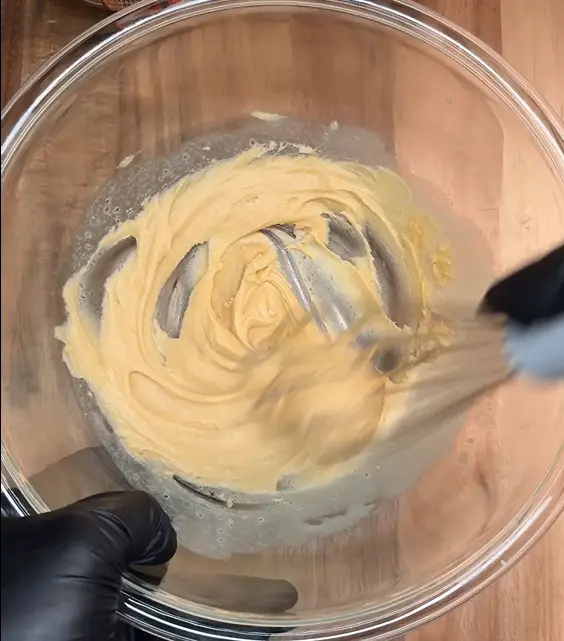
  • In a large glass bowl whisk together the cooled and set brown butter until it resembles a smooth and silky mixture. Refer to "Brown Butter" Section Above
  • Add 1 cup of packed brown sugar and 1/2 cup of granulated sugar and cream together until the mixture is light and airy (Should change to a lighter color).
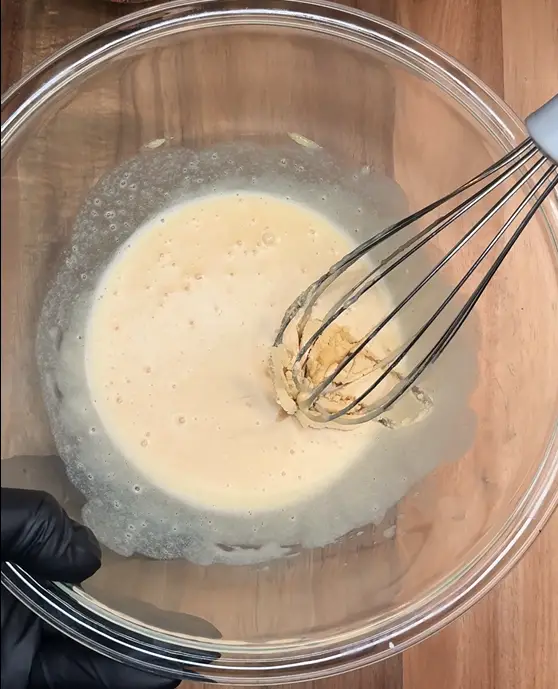
  • Add 2 tsp of vanilla extract and 6 tbsp of pumpkin purée and whisk together.
  • Combine 1 tsp baking soda, 1/2tsp baking powder, 2 1/2 cups of flour, 1/2 tsp of salt, and pumpkin spice with the wet ingredients. (Recommended to pre mix these dry ingredients in a separate bowl first) Fold the dry and wet ingredients together making sure not to over mix.
  • On a cutting board, transfer your cooled caramel mixture and break apart into small pieces. Cut into smaller bits with a knife or other utensil.
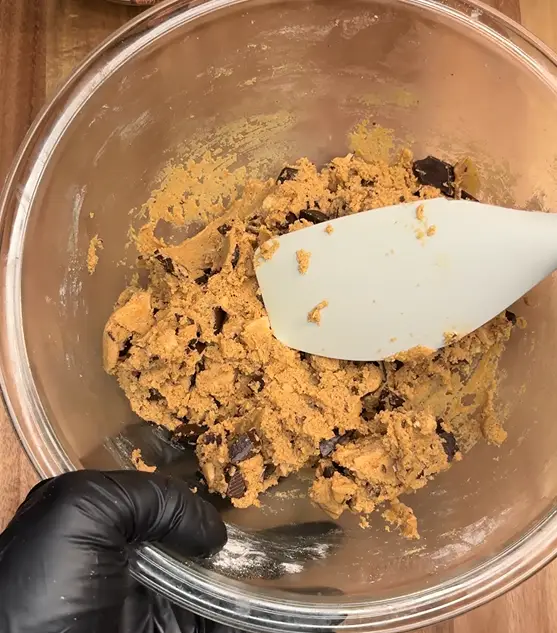
  • Fold the caramel bits and 1 cup of chocolate chips with the dough making sure not to over mix.
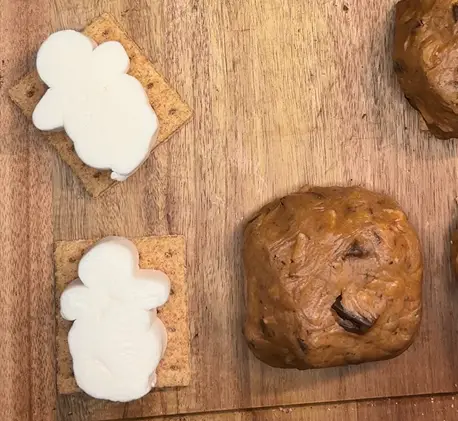
  • Separate the dough into 16 even balls and set aside. Lay out your gram cracker squares along with a marshmallow on each piece. Smoosh down your dough balls slightly into a circular disk. Lay the dough on top of the gram cracker and marshmallow and fuse the dough over them. Do not worry if the dough does not cover the whole s'more, the dough will expand in the oven.
  • Transfer your cookies to a tray and cool in the refrigerator for at least 1-2 hours. Tip: for an even better tasting cookie keep in the refrigerator for 1-2 days.
  • Preheat your oven to 350°F and Line a baking tray with parchment paper or nonstick spray/tinfoil.
  • Right out of the refrigerator, line your cookies on the tray leaving at least 4 inches of space between each cookie. For best results it is recommended to bake cookies in small batches.
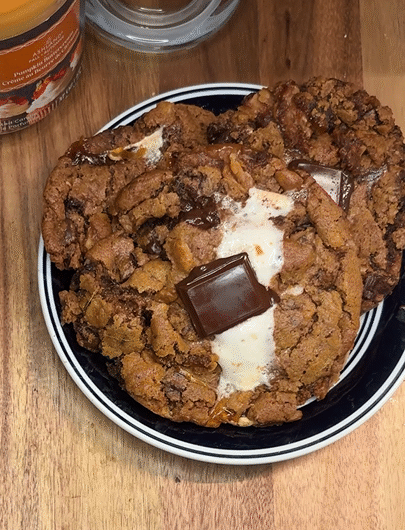
  • Bake for 15-16 minutes. (Time may vary depending on your oven) Please keep an eye on your cookies!!! Once cookies are browned on top and set, remove from the oven and leave on the hot tray for 5 more minutes (They will continue to cook and set). After 5 minutes remove to a cooling rack. Refer to "Baking" Section Above
  • Enjoy now or store in an airtight container for up to 5 days!

Recipe Video